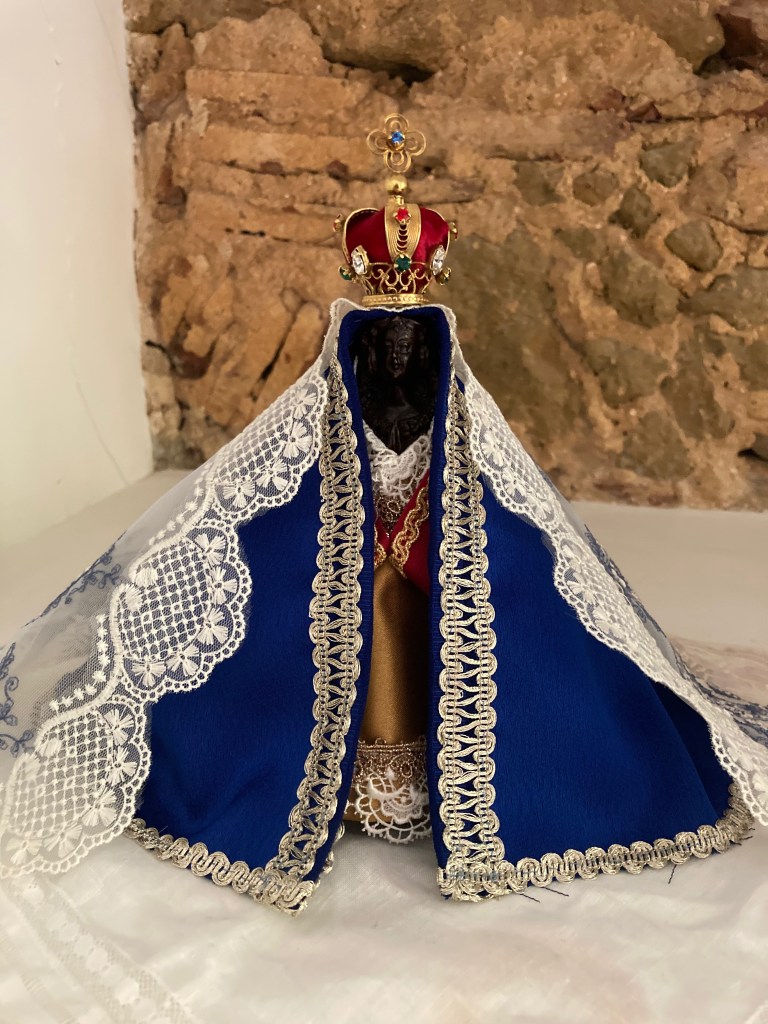
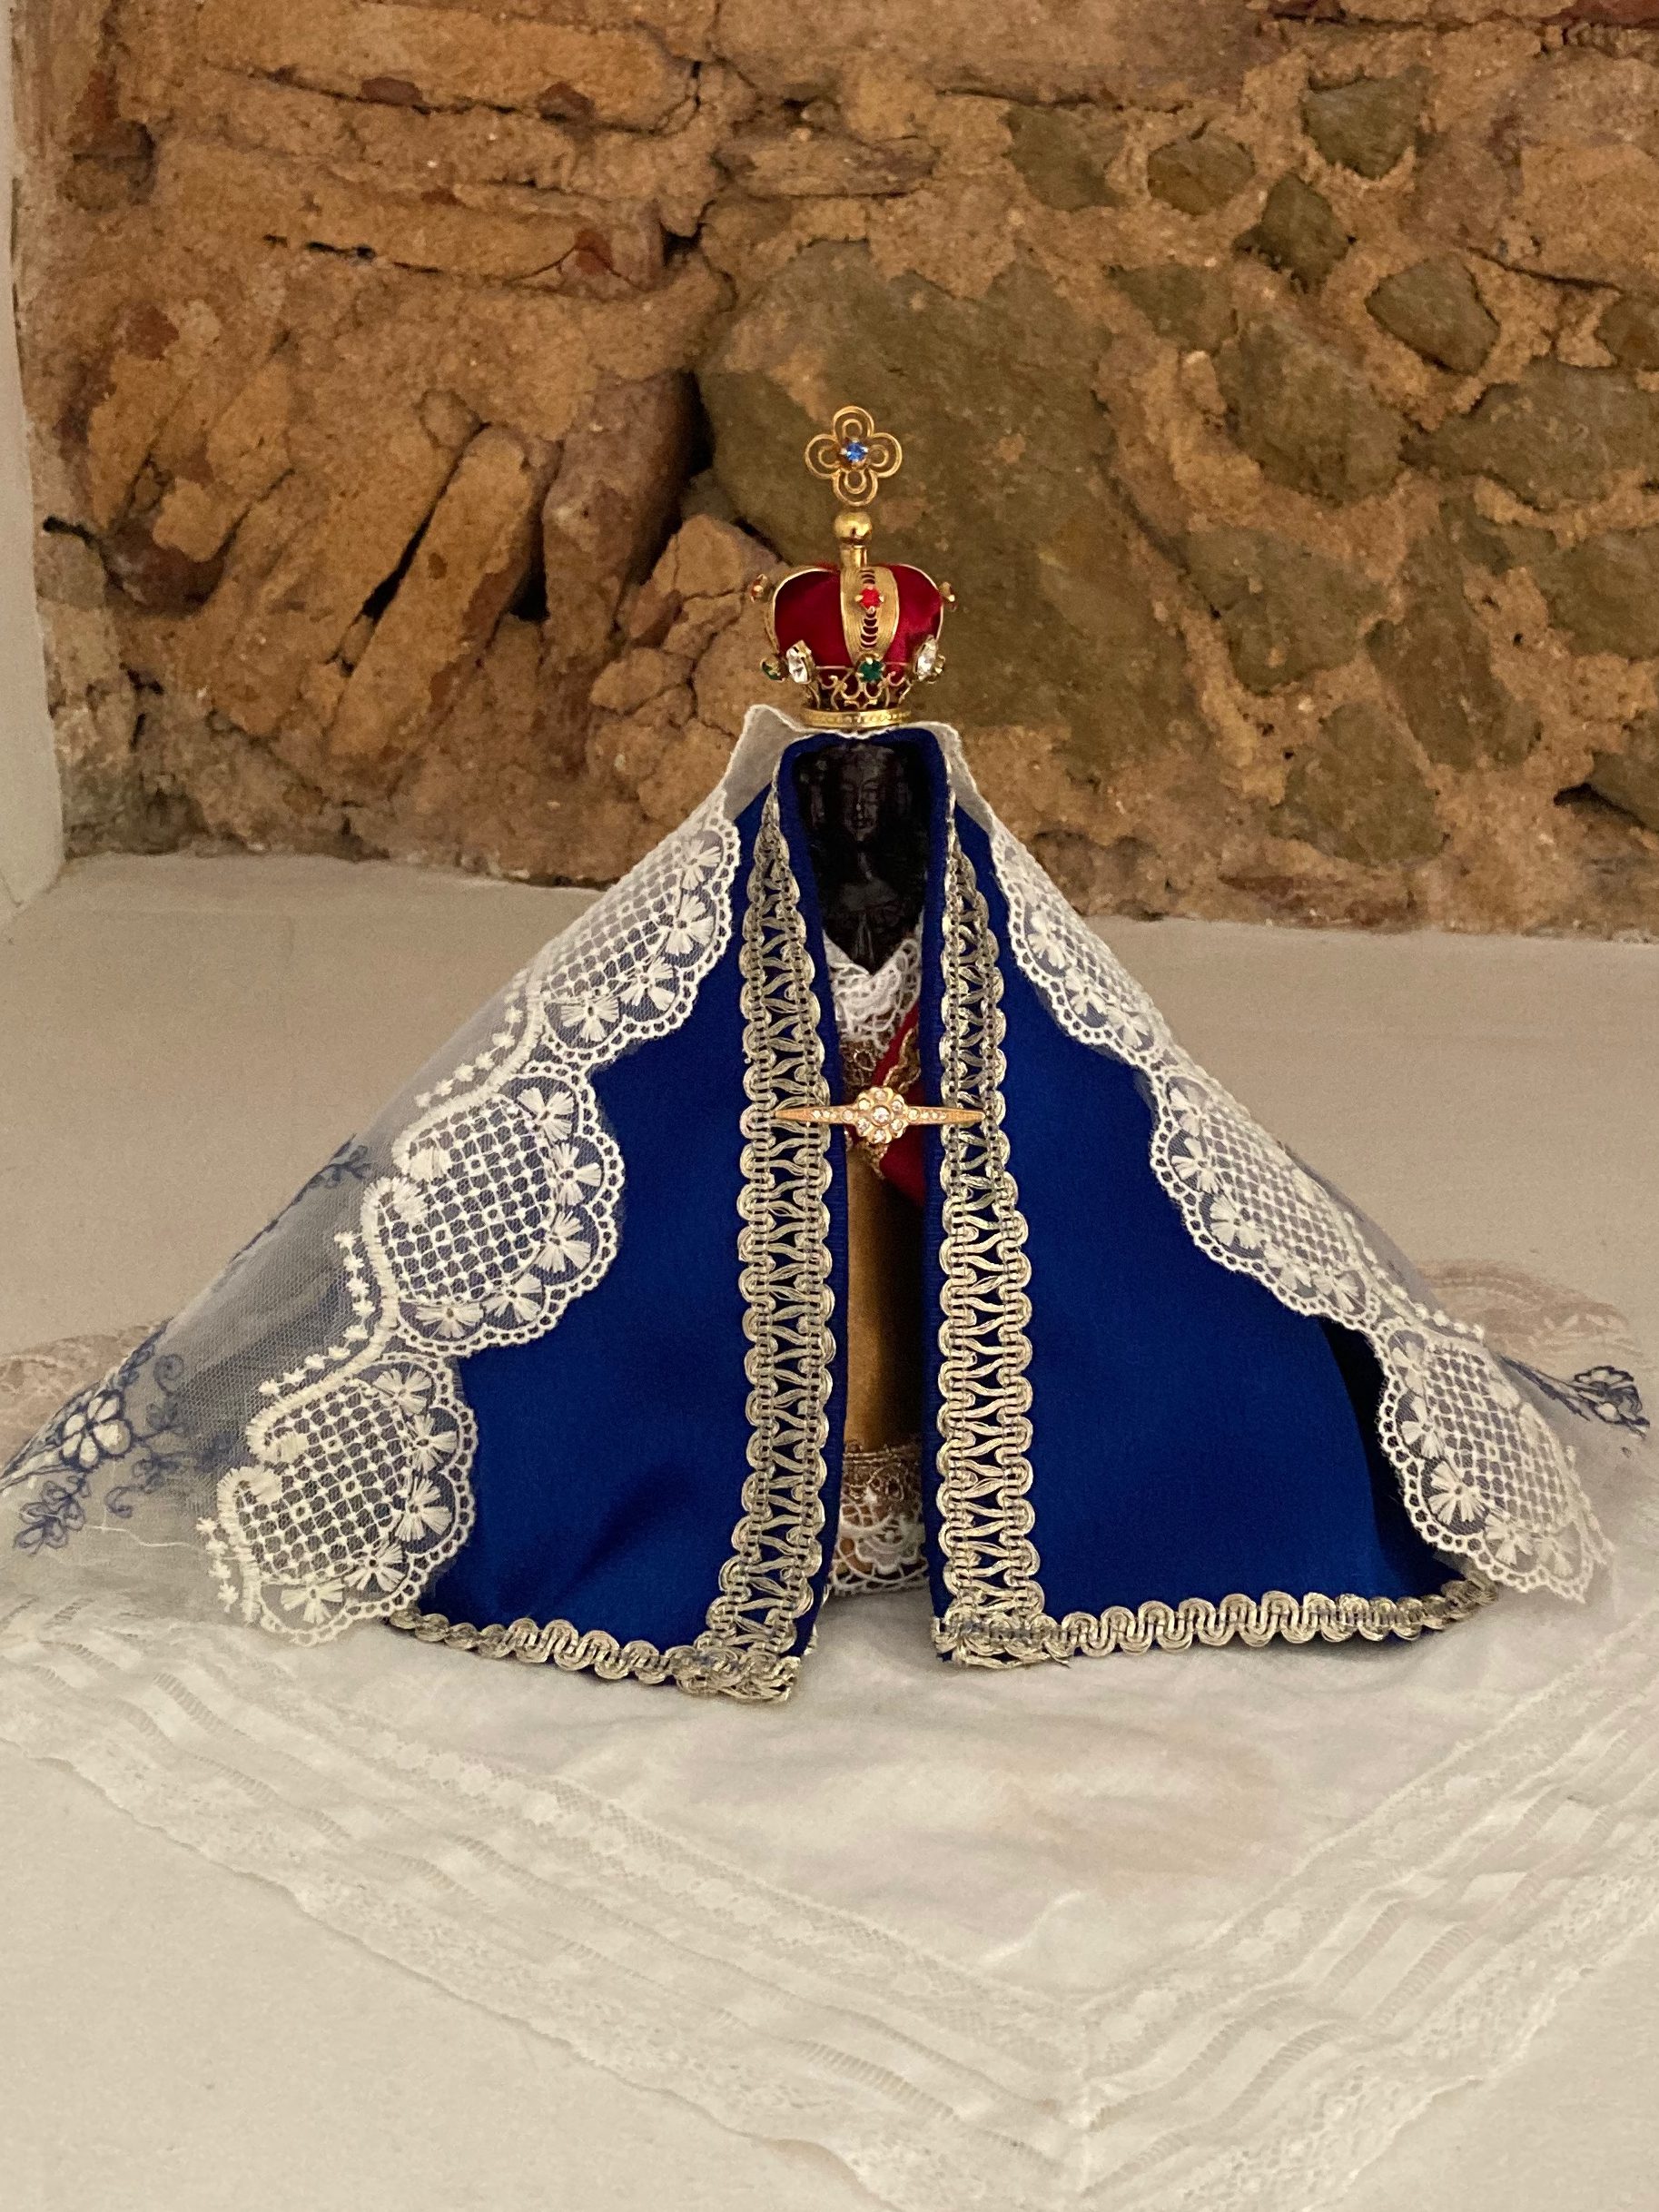
I did finally finish a blue mantle for Our Lady. The combination is really lovely, I think.
The fabric was a rather heavy knit with a touch of stretch but lovely drape. Too difficult to fold and hem, so I used the trim to cover the loose edge. It doesn’t seem particularly prone to fraying, but I can add a ribbon to the inside to cover the edge when I have time. Here I am trying it on. I marked both the mantilla and the mantle with an embroidered circle where the crown pin will go through the fabric so that I use the same spot each time and don’t damage the fabric randomly.And then I remembered I had a pin from the original cape to hold it shut, and found that, and ta-da, all done. A future iteration could have embroidered floral/vine sort of patterns around the border. But this fabric is not necessarily the one to take embroidery. I’ll experiment later.
One thing I wanted to try is making a different dress for underneath. I have a lovely cherry/rose sort of colored satin that is light and drapey. I want to see how that would work for a different style of dress. The original image has a carved drapey gown. Not sure I can duplicate the look, but it would be interesting to experiment.
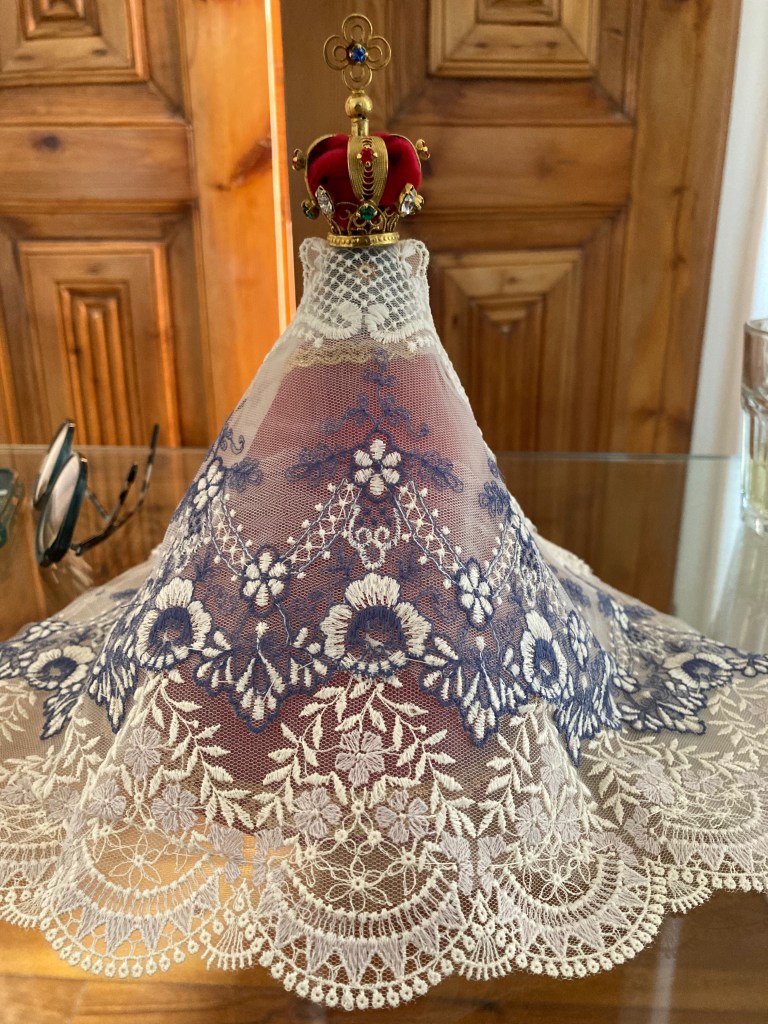
The blue mantle is still underway, as I got sidetracked making a lovely lace mantilla… made from the remnant lace I scrounged at a couple of shops in Barcelona:
It was fun learning to sew the embroidered laces (for now tacked together gently without any knots, so they can be undone and redone if necessary), and it seemed quite possible that it’s not too difficult to embroider on netting to make one’s own designs. I used a piece of sheer gold-white organza underneath as a support, though I’m not sure that’s necessary.
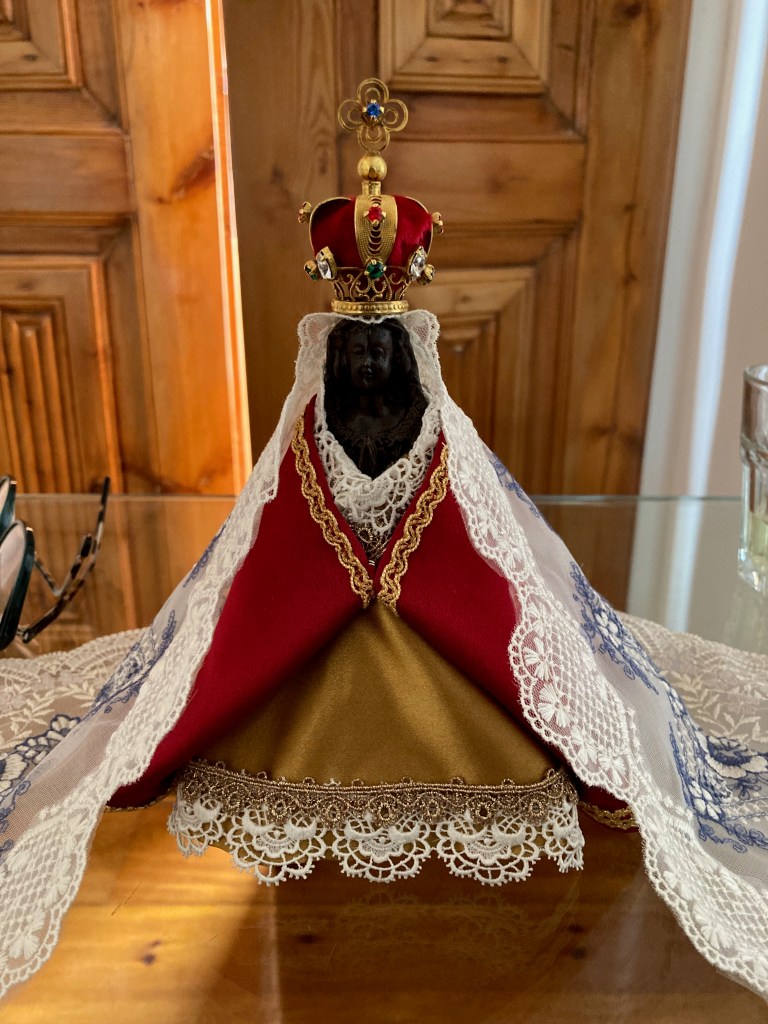
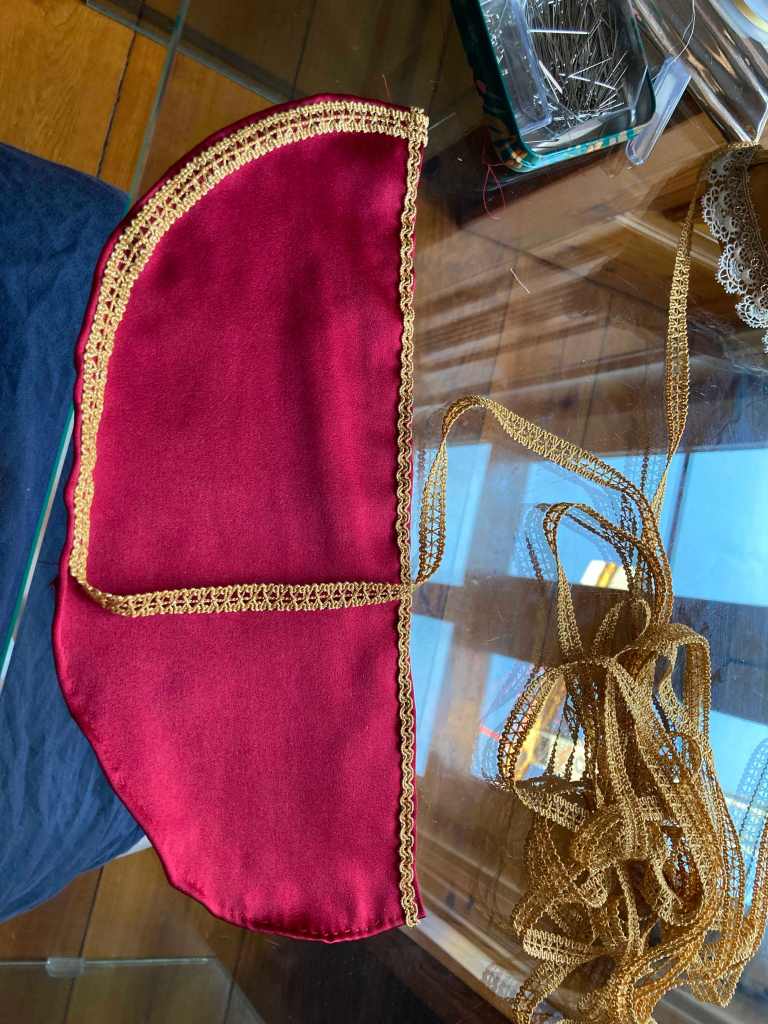
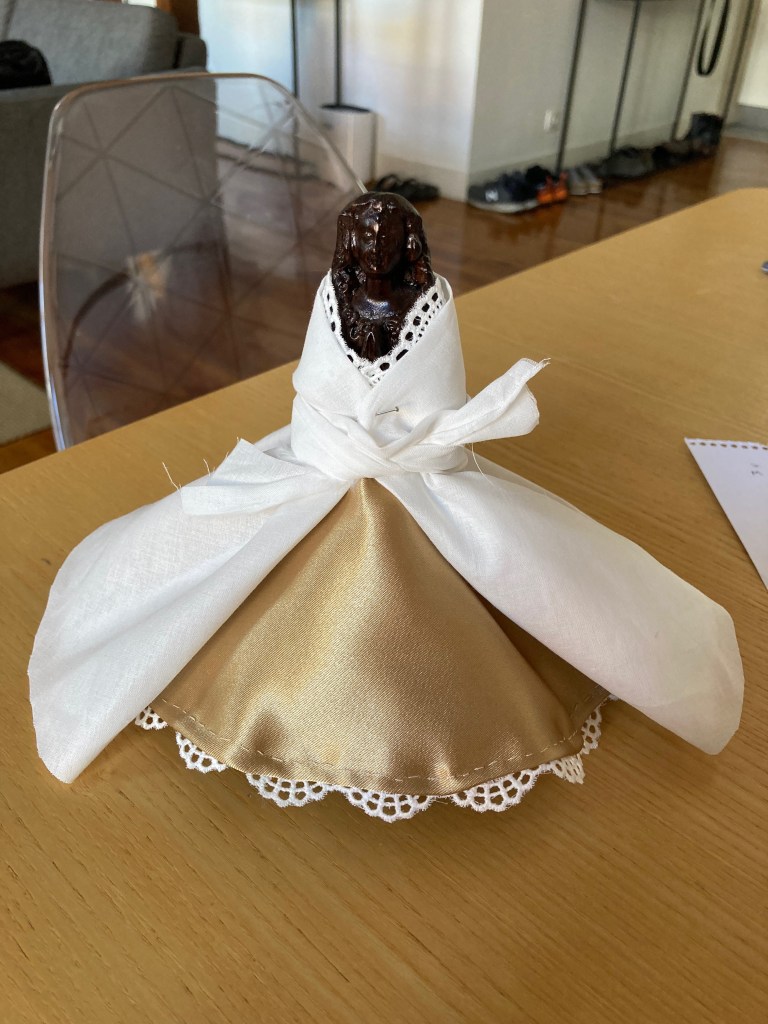
I’m pleased enough with this gold underdress with red overdress! The gold underdress was a challenge, but today I set about adding lace and that improved it quite a bit:
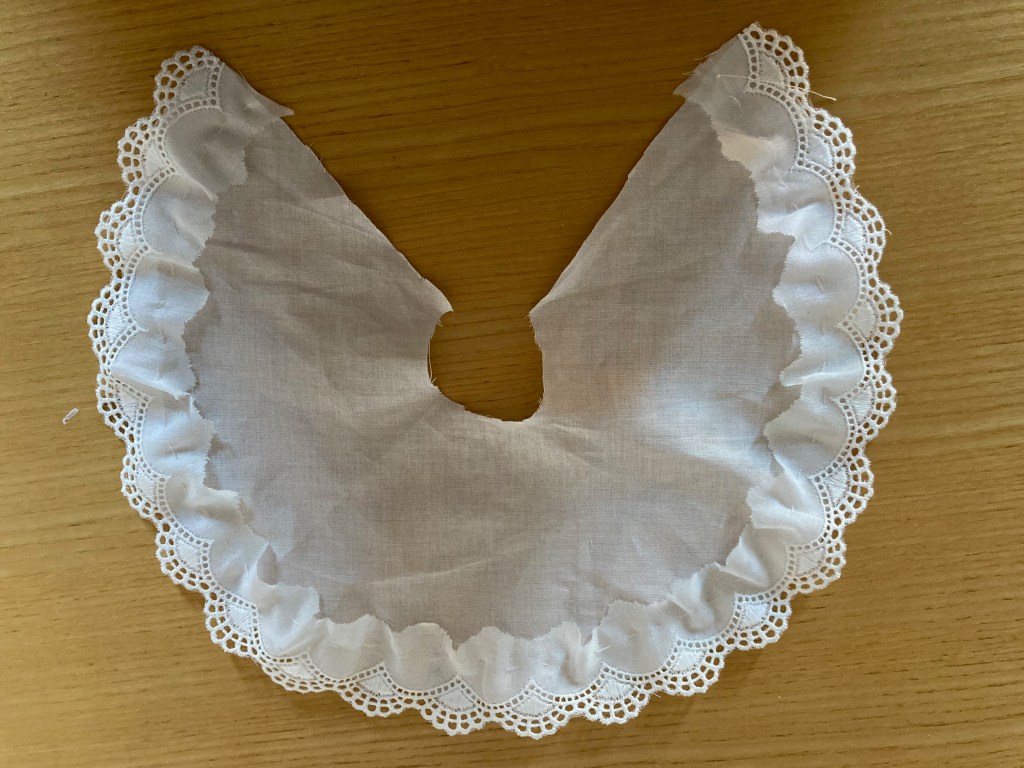
I’m starting to agree with a friend of mine who joked that we’d all be better off if we just decorated the entire world with ribbons and lace. I’m thinking lace collars need to make a comeback. We used to dress is such elaborate clothing. How dull our modern tendency to sportswear, tee-shirts, jeans and so on. All the lace on…I tacked down the white lace so that the hands are visible.I trimmed the red overdress and added a hook and eye to hold it shut and snaps to hold back the corners so the underdress shows.There ya go! Tomorrow I’ll start on the blue mantle!
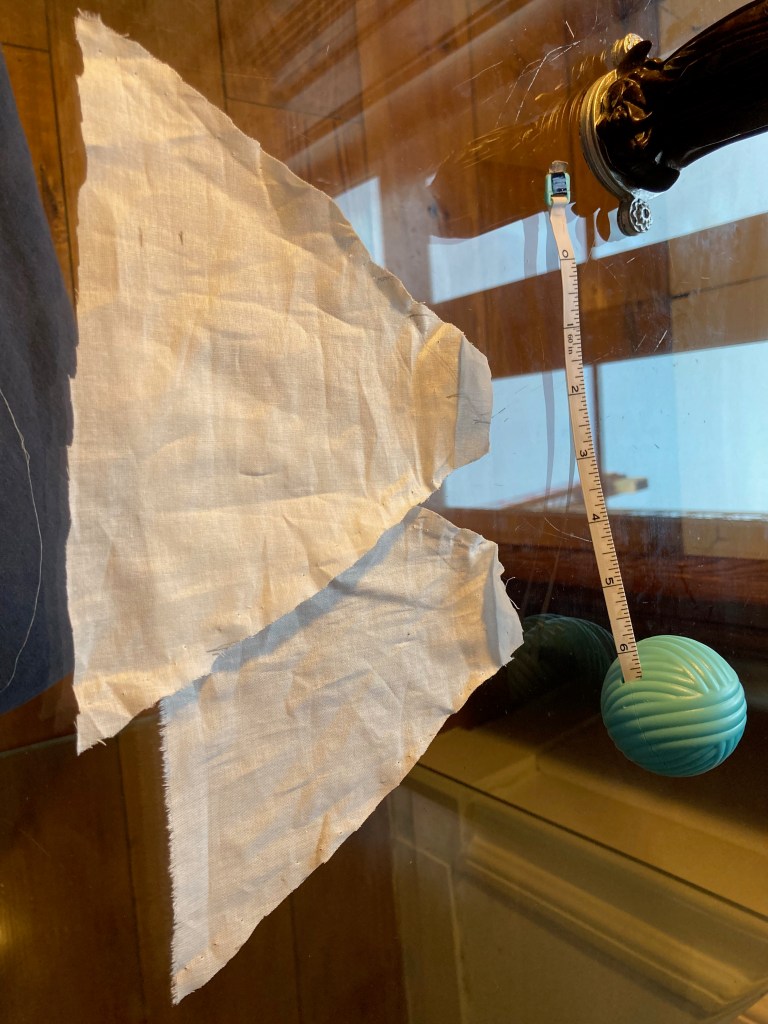
The gold underdress proved to be a struggle. I did a range of mock-ups with a light cotton, trying to get the fit I wanted: ‘A frame’ as it were, with the hands visible and the right amount of extension around the ankles. Multiple tries with modified rectangles and semi-circles didn’t work at all.
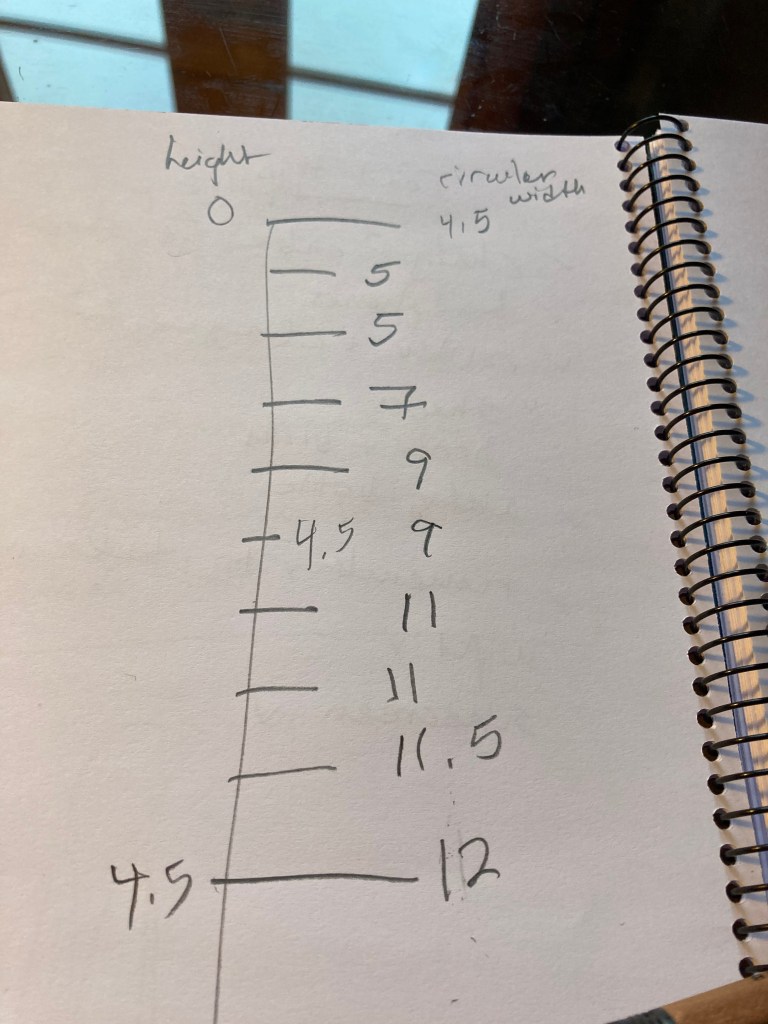
This single-sheet wrap sewn up the front ended up having a weird pointy skirt instead of the A shape I was looking for. Finally I tried math: marking a measurement every half inch along the height of the statue, using the measuring tape to make a circle in the air around the statue where I imagined I’d like the dress to be (thus touching the body at the top, but extending out a few inches at the bottom hem). The math. However, after cutting this from a single piece I realized I really needed a ‘sandwich’ – a front triangle and back triangle sewn up the sides, not unlike some of the dresses I myself wear.The two pieces…Loosely pinned on to check the fit.
Doing the sewing in the gold satin was a bit hampered by the lack of an iron in the airbnb where I am staying. I discover (duh) that fabric that doesn’t wrinkle easily also doesn’t iron easily. Some fabrics will ‘cold press’ if left under a heavy book overnight. Not this one. So, this will have to be a “please don’t look at the back!” dress for now. Another time I’ll make a tidier one. Nonetheless I think it’s going to work well with the red overdress.
The final basic gold dress (ornament to come).With the red overdress – now I can start adding lace and other details.
So the rough idea for the red overdress is like this. Off we go to see how it works out!
I folded red silk over the cotton model to give it more body (this red ‘silk’ (polyester) is quite mobile and soft.
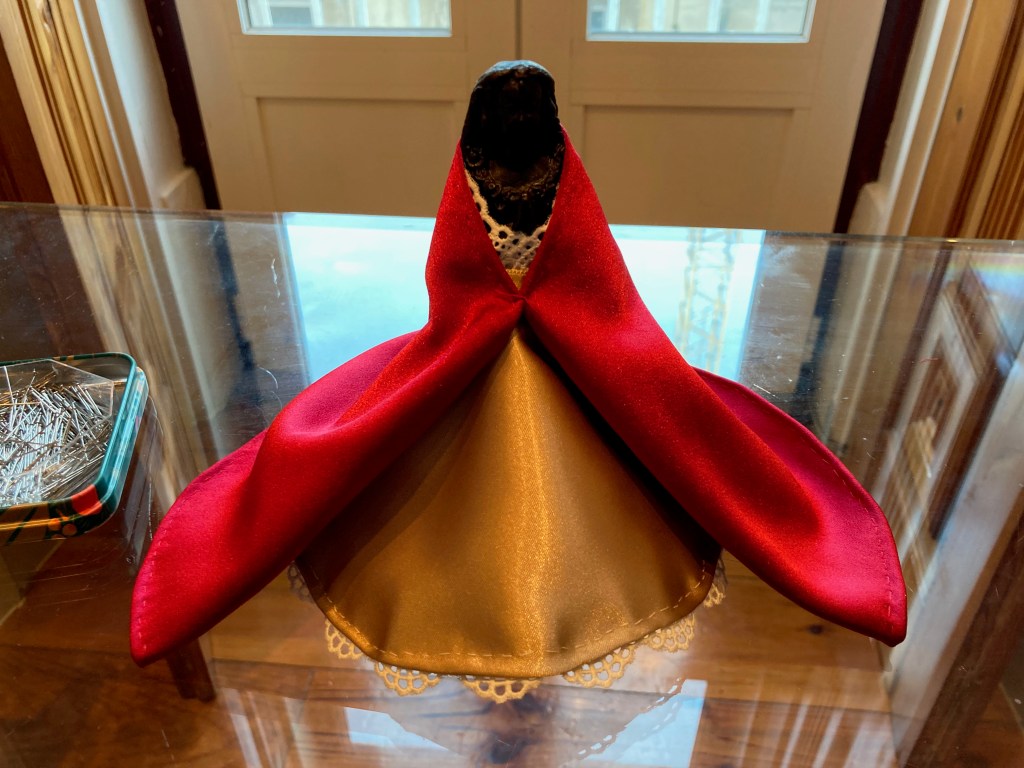
I stitched the finished overdress shut just below the hands to try it on.
So it’s going in the general direction I would like. I folded the corners of the red dress back to reveal more of the gold skirt. I’d like the gold skirt to be a little less buoyant. And the red dress is about an inch too long. I will probably shorten the red overdress first, and see again how it hangs, before possibly re-doing the gold underskirt. Once the length is correct, I also want to narrow the red dress at the top (and possibly belt it) to make it less like a cape.
When I lie awake at night I enjoy brainstorming what I will do to resolve this or that problem. I did try folding and pleating the gold underskirt in various ways but I don’t like the result at all. I think it might be better if it were simply narrower altogether. I will probably cut a new one entirely, as the existing one is quite cool and might have a good use in a different context.
Here’s the red overdress without the skirt:
I put two pins in to mark the new length I’m going to try (I might just fold it up and tack it first, to see if I like it shorter. Fold more, pin more, cut less is a good strategy in the beginning, to try out different shapes.
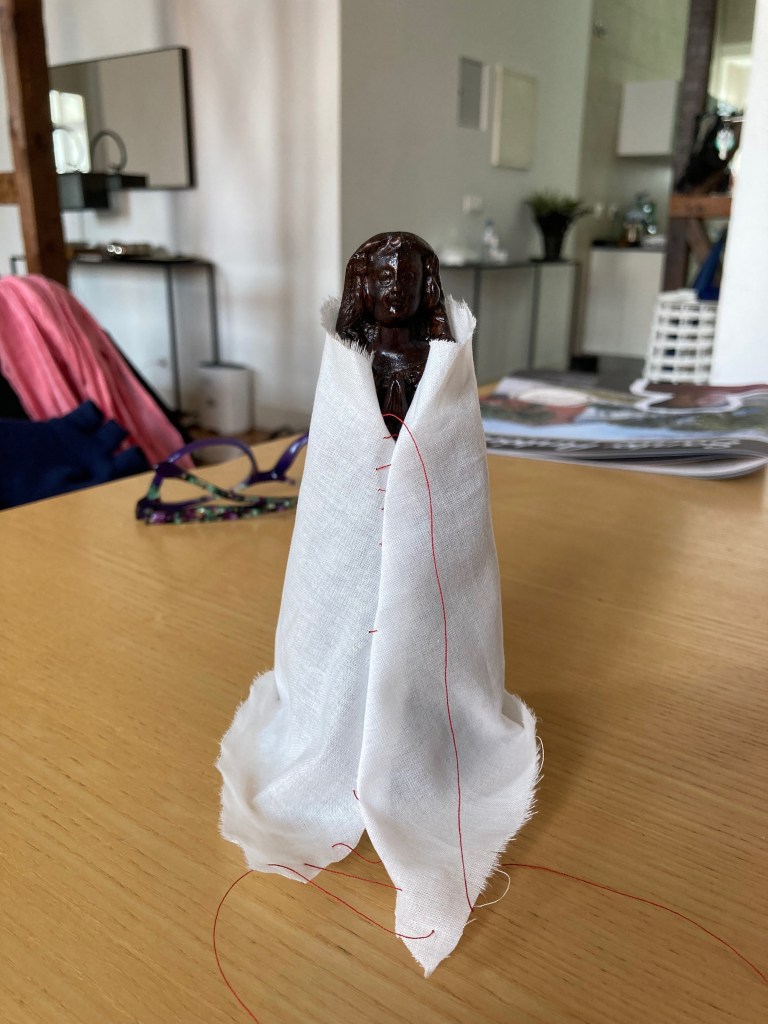
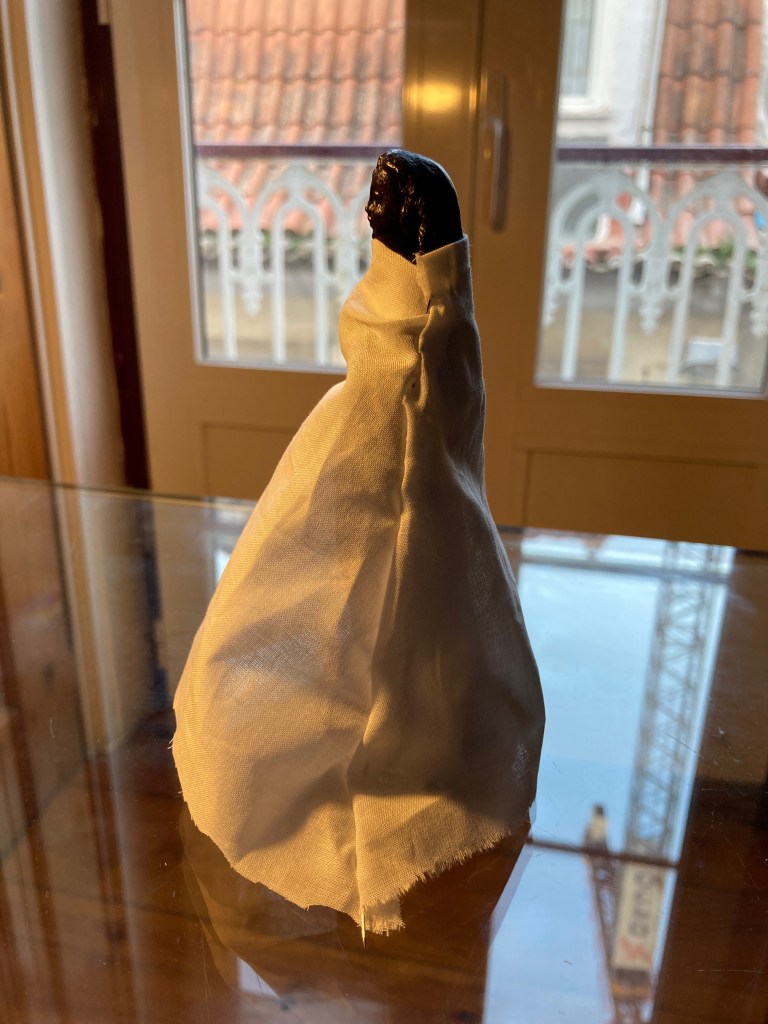
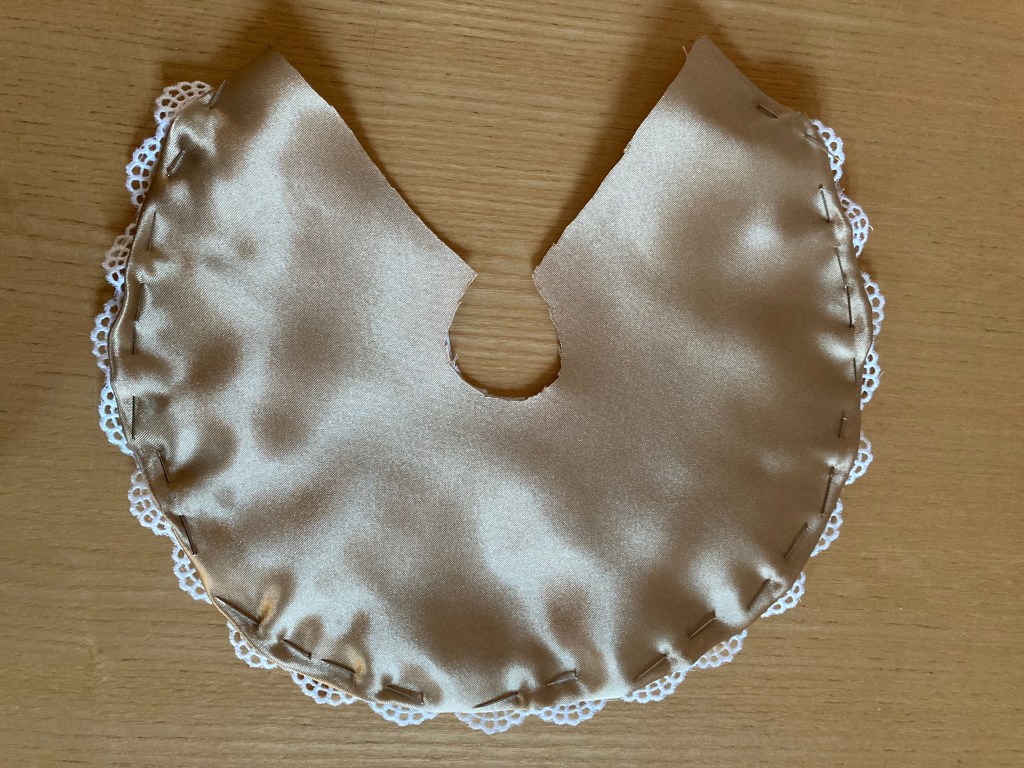
So I began sewing the first layer of clothing for Our Lady of Aparecida. Here’s how it went.
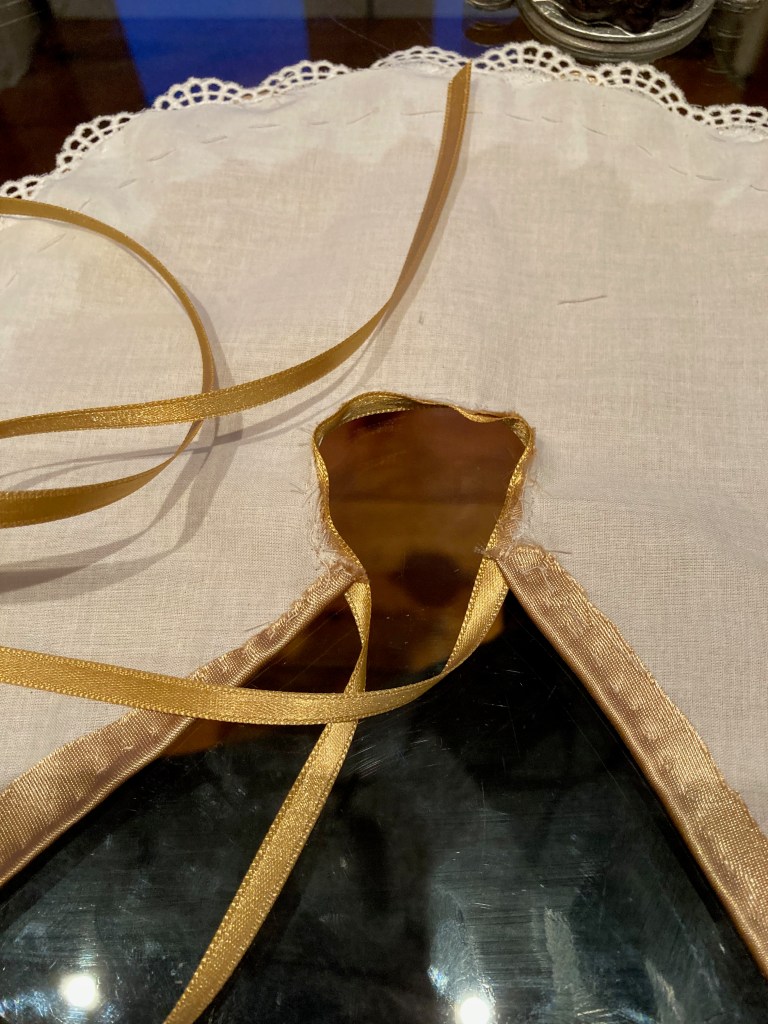
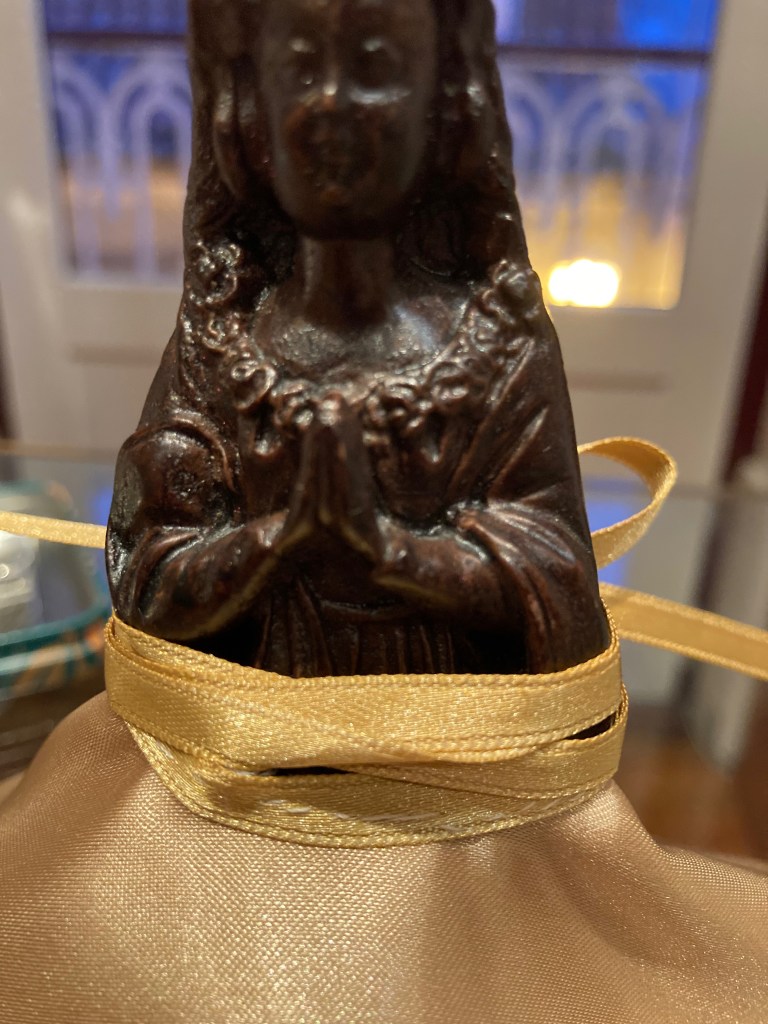
First I cut a square of handkerchief cotton, then trimmed it into a circle, cut the center opening, and tried it on the statue. I trimmed away excess until it was a good fit, then lightly tacked a simple lace to the perimeter, with the idea that it would serve as a kind of underskirt for the satin skirt. Anything that doesn’t work can be redone!Next I pinned the cotton to the back side of the gold satin and trimmed the satin to be just a little larger than the cotton. Now I was figuring that the cotton would serve as a kind of lining and support for the satin (as it may yet be decorated with trim or embroidery, and the cotton helps keep everything smooth).After some pondering I turned the satin under so that just the bit of lace showed around the edge, pinned it, and did my best small tidy stitches to hem it. I left the top undone for the moment, as I still wasn’t sure exactly what I would do up there.Here you can see the half-hemmed satin, right side up, in front of the statue.I decided to sew a ribbon to the waist opening to let the skirt be tied on securely. I hemmed the inner edges, folding the satin over the cotton, and did a whip stitch around the waist opening before going back and sewing on the ribbon. Since the ribbon needs to run on a curve I had to hold the waist-opening edge vertically as I sewed. The ribbon gets tied like this for now. I put a little shawl of lace around her shoulders, sewed it shut below her hands so it would stay in place, and then tied the skirt over it. I may do some rather drastic modification of this underskirt after I finish the red overdress, because it’s not yet clear how they will interact. The stiff width of this gold skirt may be problematic – in which case I can reduce the size of it, add gathers or pleats, or take out the cotton lining. On the other hand it might turn out to be most excellent, since both the overdress and mantle are likely to be rather stiff, too. The red dress fabric is the most drapey, but I will probably build it on a cotton lining as I did this skirt, and may additionally line it with another satin. I also intend to decorate this underskirt, which will add weight and change the way it hangs, but I’m waiting to get the red dress done before doing any decorating, so that I can coordinate the trims I use.
I know that some people like to work spontaneously, but I am gifted with the love of planning. So this is how I’m strategizing the new dress and mantle for Our Lady of Aparecida.
The image is customarily dressed something like this. The carved wooden image (or a replica in resin) is dressed in a dark blue velvet mantle decorated with gold trim and varied embroidered ornaments, usually with a pair of flags on the front and a decorative pin holding the mantle closed. The mantle is secured by the pin of the crown, which goes down through a hole in the hood of the mantle and into the appropriate hole in the top of the head. The unvested image already has a draping robe, loose hair, folded hands, and a garland of flowers around the neckline of the robe. The hands are a key feature when designing clothing: I like to have them remain visible. The image is also very egg-shaped, so securing clothing needs to be done around the shoulders or around the hands, but would be harder to do around the waist.
My main goals are as follows: 1) to make a red dress for her to wear under the blue mantle; I’d like the dress to be quite complex and include a gold under-gown (see below) 2) to make a white wimple of some sort 3) to make a new blue mantle 4) to make a dramatic Spanish-style floor-length lace mantilla
The dress: One image that struck me as I was researching the dresses of Our Lady and the dresses of historic queens was this one of Queen Anne of Bretagne. The red silk overdress and gold brocade underdress are a stunning combination. The square neckline is not as interesting, nor are the bell-sleeves. But the skirt part is very interesting. This dress (of Queen Henrietta Maria of England) has some interesting lace layering at the top and on the sleeve cuffs which is interesting. The puffy sleeves are not so interesting. The idea of making a gold skirt with white lace tunic-top, belted, and then a red satin overdress over that, is one possibility.This skirt is interesting for the layering. I am thinking that the skirt could be built on a cotton support, with strips of satin alternating with overlapping layers of organza and/or lace to make this kind of effect. The red satin outer dress could be fairly smooth, held shut above and below the hands (with some small stitches)and trimmed with gold. This way it would hang open over the layered skirt, but be fairly closed at the top.
Another thing that is striking in this image is the ermine-lined cloak. I have some fake fur, quite light and fine, which could be used to trim the mantle. I’m thinking perhaps an inner trim (using inner and outer trims is interesting! The mantle will be initially lined with cotton (the weight used for bedsheets) to provide stability for the beading and embroidery. Once that decoration is done (which I will probably do on a hoop before even cutting the fabric), I will line the mantle with gold satin to cover the inner stitching. I couldn’t find blue velvet but got a lovely heavy textured ‘silk’ (polyester) which has some body.
Once the dress is done, I plan to make a wimple and veil like a religious sister might use, just of white satin, falling above the hands in front and almost to the waist in back. I plan to cover this with a layer of decorative lace so it isn’t too plain. That and the mantle (which normally has a hood, though I could do it just with a high collar in back, like a priest’s cope) will have a fixed hole for the crown pin, trimmed with stitching so it’s stronger and in a fixed place (as opposed to stabbing the pin in a different spot each time).
And finally, I am a huge fan of the Spanish style mantillas, and have a stash of Spanish lace, so I intend to make a lovely light cloud-like mantilla that will go from the head to the floor. Bridal, as it were.
This image of mine is only about 10 inches high, so we will be exercising our clumsy fingers and bad eyes to do this! But it should be very fun. I’ll post as I go… including surely many re-stitchings when I do it wrong the first time!